Nuxt + Contentful + Netlifyでブログ作成全手順<後編>
Nuxt.jsを使用してブログ作成の後編です!
<前編>ではNuxtプロジェクトの作成からContentfulのセットアップまでの手順がまとめてあります。
<後編>では記事の作成、Nuxtでの表示、Netlifyへのデプロイまでの手順をまとめていきます!
記事の作成
上部のメニューから「Content」をクリックし、

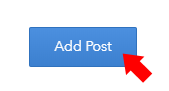
「Add Post」をクリック
記事の作成フォームが表示されるので、記事の内容を記入して「Publish」
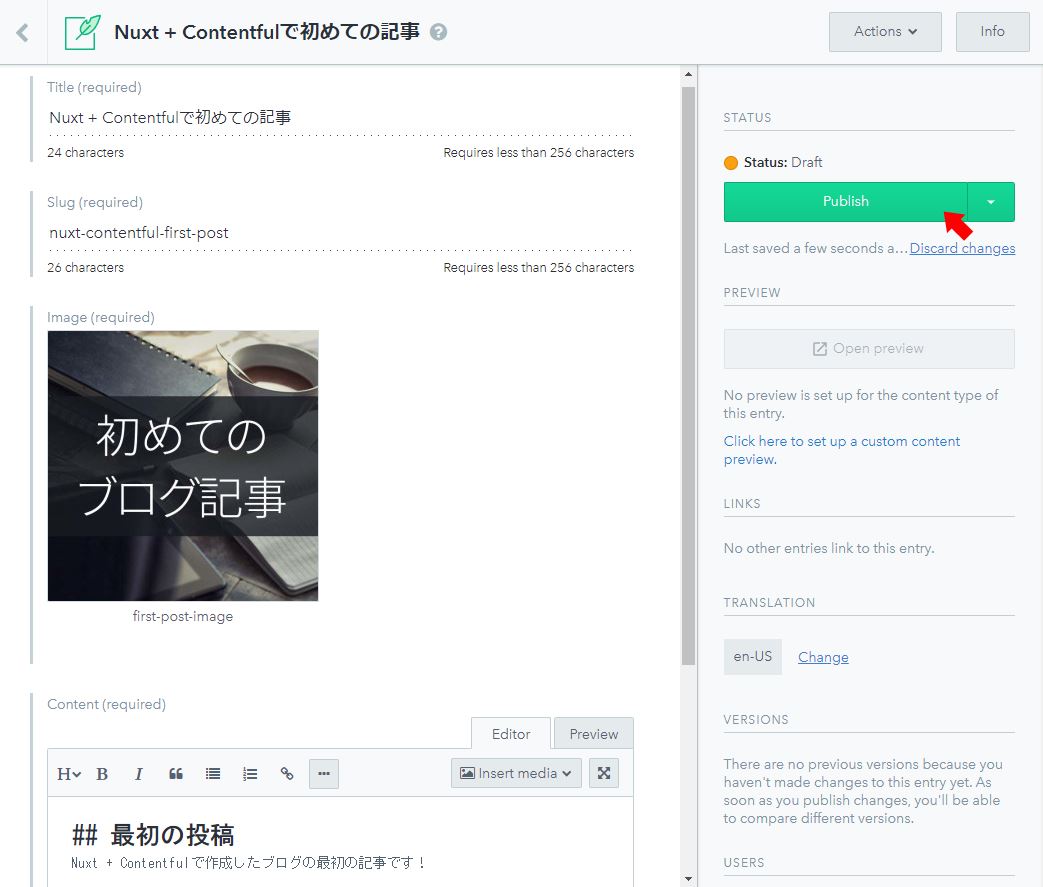
すると、記事が作成できます。
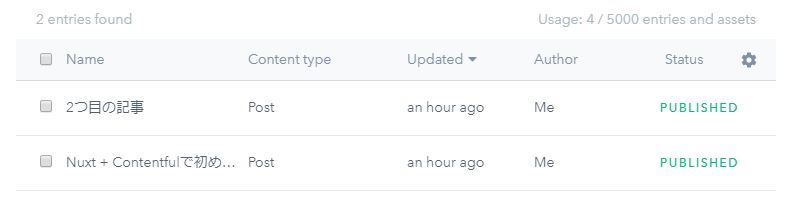
同じ要領で2つ目の記事も作成しました。
Nuxtでの記事の表示
まず、トップページに記事の一覧を表示してみます。
pages/index.vueを下記のように書き換えます。
<template>
  <div class="posts">
    <div v-for="(post, index) in posts" :key="index" class="post">
      {{ post.fields.title }}
    </div>
  </div>
</template>

<script>
import client from '~/plugins/contentful'
export default {
  asyncData({ params }) {
    return client
      .getEntries({
        content_type: 'post',
        order: '-sys.createdAt',
      })
      .then(entries => {
        return { posts: entries.items }
      })
      .catch(e => console.log(e))
  },
}
</script>
そして、下記のコマンドを実行します。
$ npm run dev
すると表示される「http://localhost:3000」のようなURLをブラウザで開くと
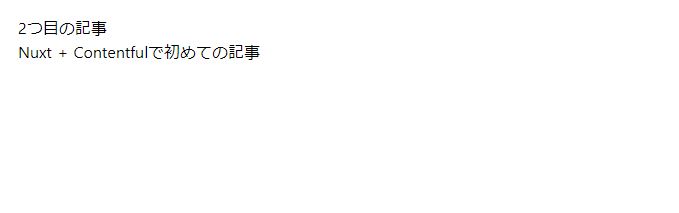
先ほど作成した記事のタイトル一覧が表示できました。
pages/index.vueを下記のように書き換え、少し見た目を整理してみます。
<template>
  <section class="latest-posts">
    <div class="posts">
      <nuxt-link :to="'posts/'+post.fields.slug" class="post" v-for="(post, index) in posts" :key="index">
        <div class="thumb">
          <img :src="post.fields.image.fields.file.url">
        </div>
        <div class="post-text">
          <p>{{ formatDate(post.sys.createdAt) }}</p>
          <h2>{{ post.fields.title }}</h2>
        </div>
      </nuxt-link>
    </div>
  </section>
</template>

<script>
import client from '~/plugins/contentful'
export default {
  asyncData({ params }) {
    return client
      .getEntries({
        content_type: 'post',
        order: '-sys.createdAt',
      })
      .then(entries => {
        return { posts: entries.items }
      })
      .catch(e => console.log(e))
  },
  head: {
    title: '記事一覧',
  },
  methods: {
    formatDate(iso) {
      const date = new Date(iso)
      const yyyy = new String(date.getFullYear())
      const mm = new String(date.getMonth() + 1).padStart(2, "0")
      const dd = new String(date.getDate()).padStart(2, "0")
      return `${yyyy}.${mm}.${dd}`
    }
  }
}
</script>

<style lang="scss">
section.latest-posts {
  padding: 10px;
  .posts {
    max-width: 900px;
    margin: 0 auto;
    padding: 10px;
    display: flex;
    flex-direction: row;
    flex-wrap: wrap;
    background: #ddd;
    a.post {
      width: calc(100% / 2 - 20px);
      @media (min-width: (768px)) {
        width: calc(100% / 3 - 20px);
      }
      margin: 10px;
      background: #fff;
      text-decoration: none;
      color: #111;
      .thumb {
        width: 100%;
        padding-bottom: 75%;
        position: relative;
        overflow: hidden;
        img {
          position: absolute;
          top: 50%;
          left: 50%;
          transform: translate(-50%, -50%);
          max-width: 100%;
        }
      }
      .post-text {
        padding: 5px 10px 10px;
        h2 {
          width: fit-content;
          font-size: 20px;
        }
      }
    }
  }
}
</style>
すると下図のように表示できます。
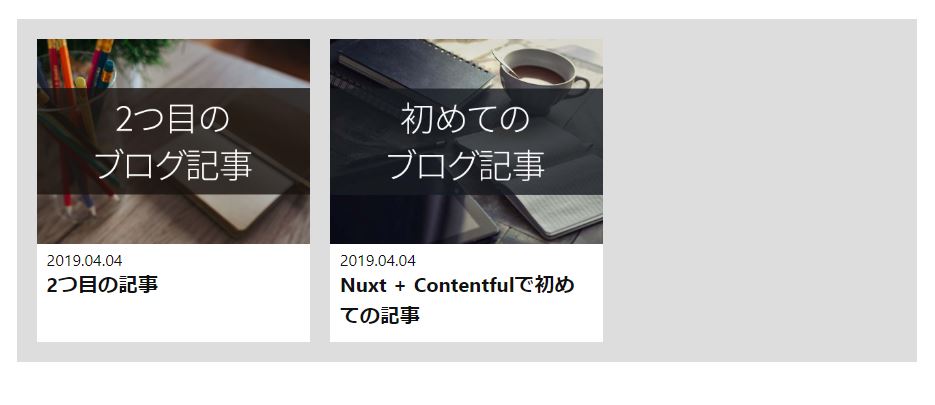
これで記事の一覧ページは一旦完成とし、記事の個別ページを作成します。
pagesフォルダ内にpostsフォルダを作成します。
そして、postsフォルダ内に_slug.vueファイルを作成します。
<template>
  <article class="article">
    <div class="single">
      <h1 class="post-title">{{ post.fields.title }}</h1>
      <p class="post-created-at">{{ formatDate(post.sys.createdAt) }}</p>
      <div class="post-content" v-html="$md.render(post.fields.content)"></div>
    </div>
  </article>
</template>

<script>
import client from '~/plugins/contentful'

export default {
  asyncData({ params, error, payload }) {
    if (payload) return { post: payload }
    return client
      .getEntries({
        content_type: 'post',
        'fields.slug': params.slug,
      })
      .then(entries => {
        return { post: entries.items[0] }
      })
      .catch(e => console.log(e))
  },
  head() {
    return {
      title: this.post.fields.title,
    }
  },
  mounted() {
    console.log(this.post)
  },
  methods: {
    formatDate(iso) {
      const date = new Date(iso)
      const yyyy = new String(date.getFullYear())
      const mm = new String(date.getMonth() + 1).padStart(2, "0")
      const dd = new String(date.getDate()).padStart(2, "0")
      return `${yyyy}.${mm}.${dd}`
    }
  }
}
</script>

<style lang="scss">
article.article {
  padding: 10px;
  .single {
    max-width: 900px;
    margin: 0 auto;
    padding: 10px;
    color: #222;
    border: 2px solid #444;
    border-radius: 10px;
    h1, h2, h3 {
      margin: 16px 0;
    }
    h1.post-title {
      font-size: 32px;
      text-decoration: underline;
    }
    .post-content {
      h1 {
        font-size: 32px;
      }
      h2 {
        font-size: 24px;
        background: #ccc
      }
      p {
        margin: 16px 0;
        font-size: 16px;
      }
      img {
        max-width: 100%;
        border: 1px solid #000;
      }
    }
  }
}
</style>
そして、記事の一覧ページから個別記事のページへ移動すると
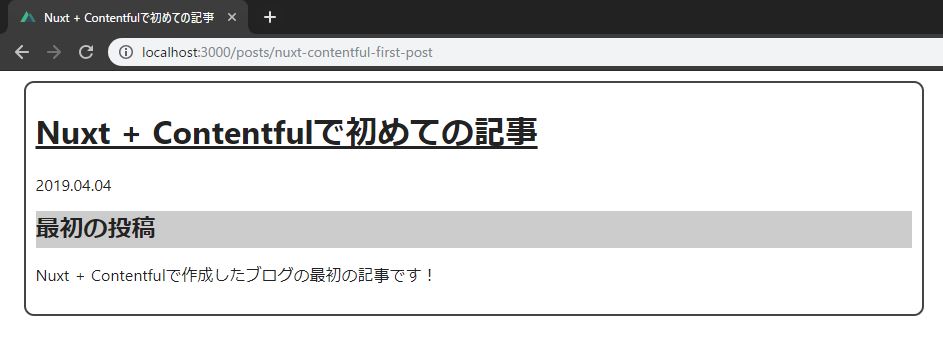
このように、記事の内容を取得して表示ができているはずです。
markdownitを使用して、記事のマークダウン記法をHTMLタグに変換して表示しています。
細かいスタイルについてはnuxt.config.js内のmarkdownitの設定項目や、CSSによるスタイリングが必要となります。
Netlifyへのデプロイ
Netlifyへデプロイ、の前に、今まで作成したnuxtプロジェクトをGitにpushします。
新しくリポジトリを作成し、
$ git init
$ git add .
$ git commit -m "first commit"
$ git remote add origin <gitのURL>
$ git push -u origin master
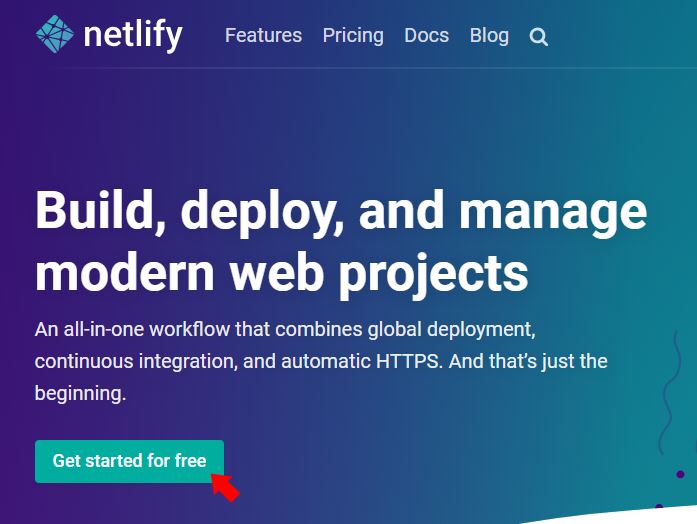
次に、Netlifyのサイトで「Get started for free」ボタンから会員登録、ログインします。
(画面は2019/4/4のものになります)
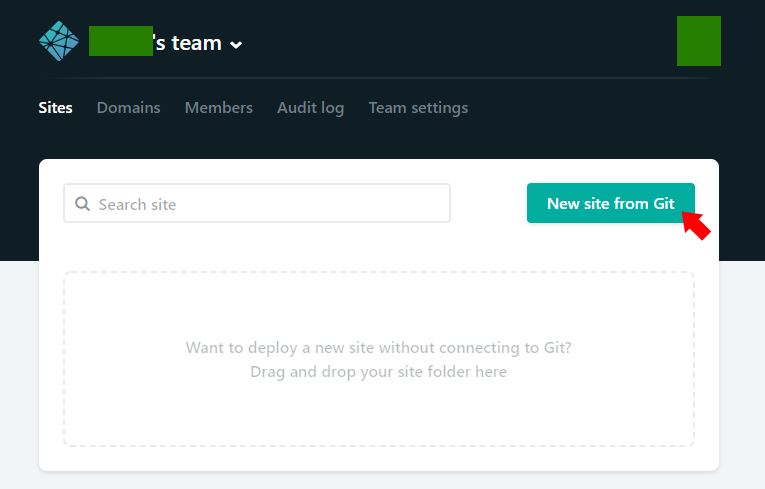
右の方にある「New site from Git」ボタンをクリック
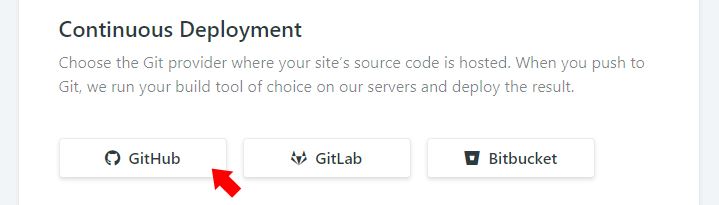
Gitのproviderを選択
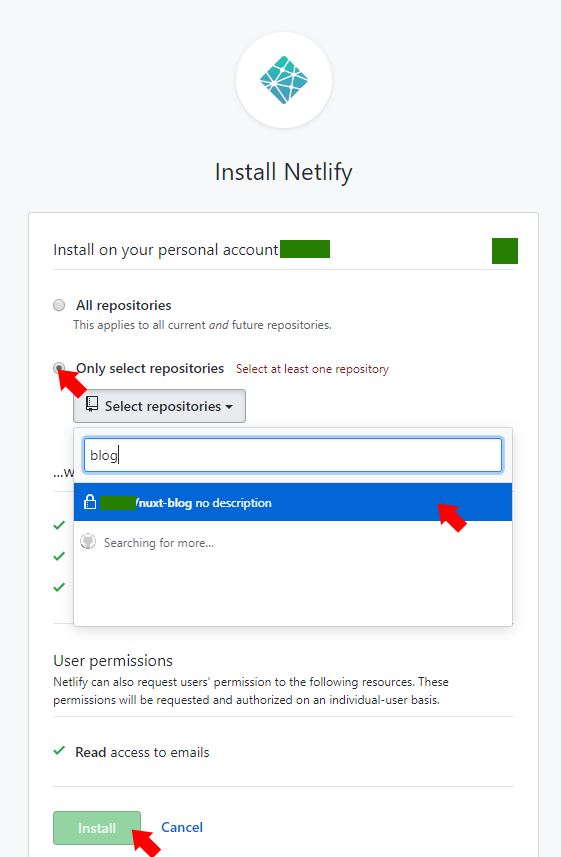
インストールするリポジトリを選択
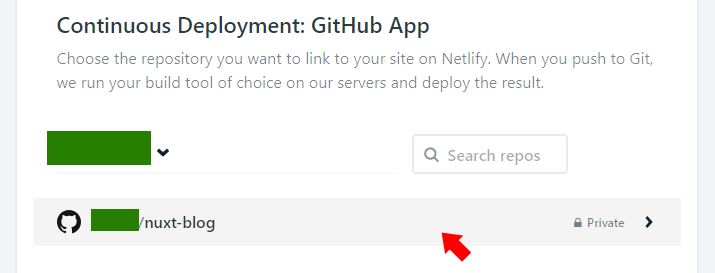
使用するリポジトリを選択し、
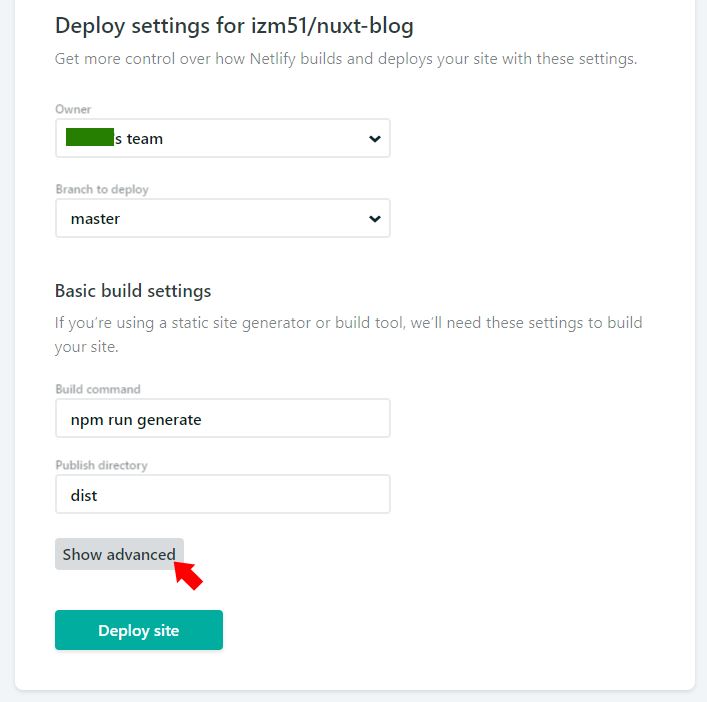
「Build command」にnpm run generate、
「Publish directory」にdistと入力し、「Show advanced」をクリック
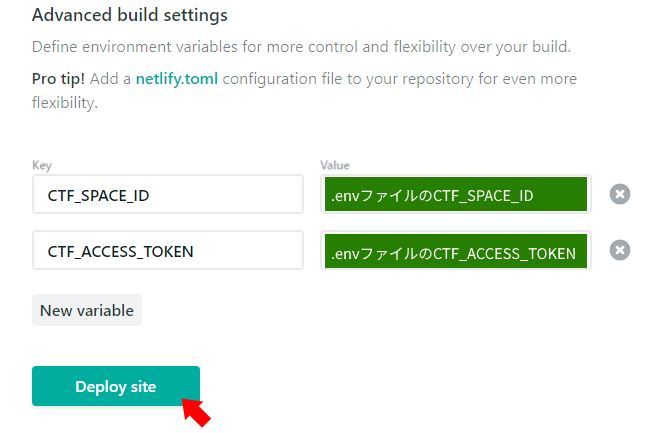
「New variable」をクリックしてキーの入力欄を表示し、
.envファイルに記述した「CTF_SPACE_ID」と「CTF_ACCESS_TOKEN」を記入→「Deploy site」
「Deploying your site」と表示され、少し待つとデプロイが完了します。
「Site settings」をクリック

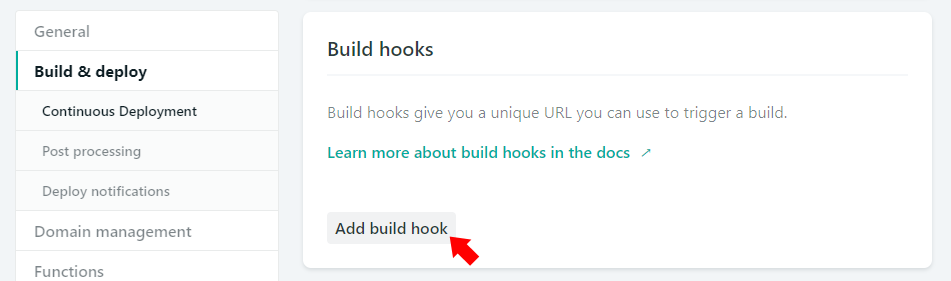
左のメニューから「Build & deploy」をクリック 下へスクロールし、「Build hooks」の「Add build hook」をクリック
「Build hook name」に「Deploy」と記入し、「Save」をクリック
表示された「https://api.netlify.com/build_hooks/~」 で始まるURLをコピー

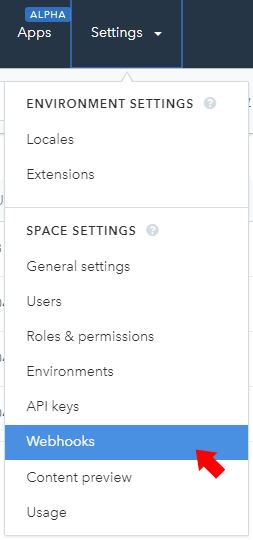
Contentfulのサイトに戻り、上部の「Settings」メニューから「Webhooks」を選択
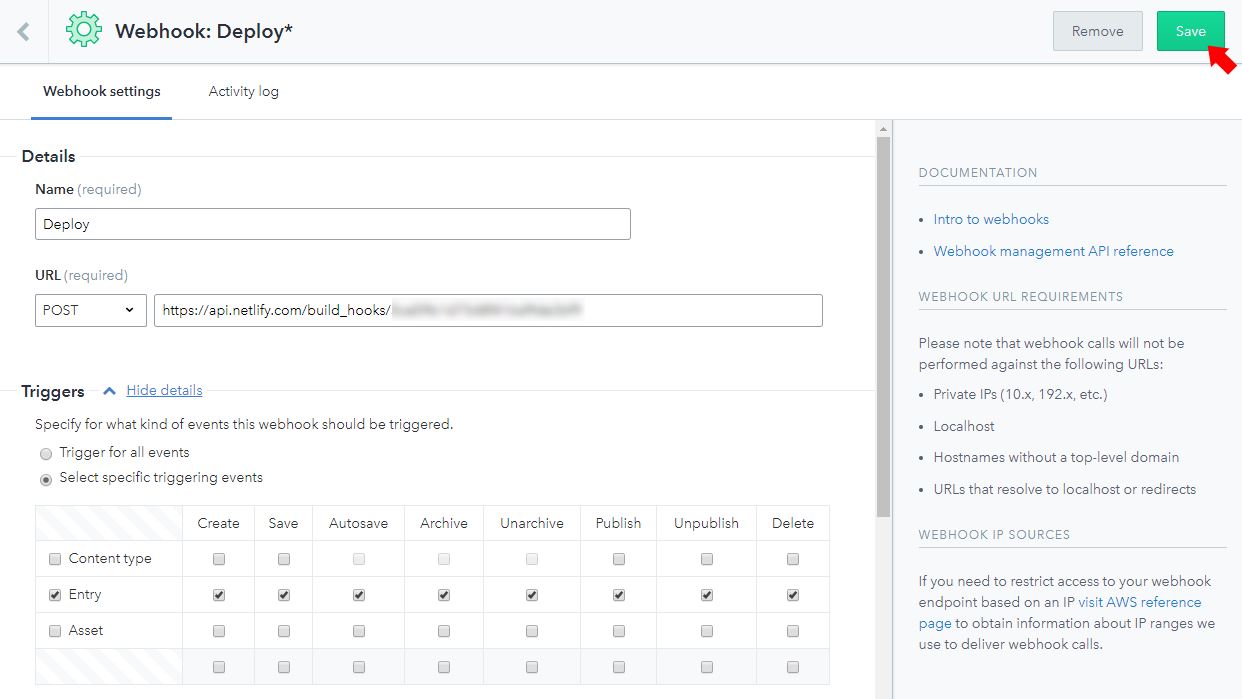
「Add Webhook」ボタンから、Webhookの設定をします。
「Details」の「Name」に「Deploy」と記入し、「URL」の入力欄に先ほどNetlifyでコピーしたWebhookのURLを貼り付けます。
「Triggers」で「Select specific triggering events」を選択し、「Entry」にチェックを入れます。
設定が完了したら、「Save」をクリック
これで、Contentful上で新しい記事の投稿や記事の編集を行うと、Webhookにより自動でNetlify上のデプロイが行われるようになります。
まとめとGithubのリンク
これにて設定が完了となり、記事の投稿とウェブサイトへの反映ができるようになりました。
ここから、ドメインの設定やデザインの変更をすることで、実際にブログとして使用できるようになると思います。
ここまでのコードをGithubで公開 しておきます。
ご自由に使用・参考にしてください!
今後は、基本的なSEOの設定や、記事のタグづけ方法なども記事にしていきたいと思っています。